
1. Document Size Specifications
To set up a bleed in CorelDRAW:
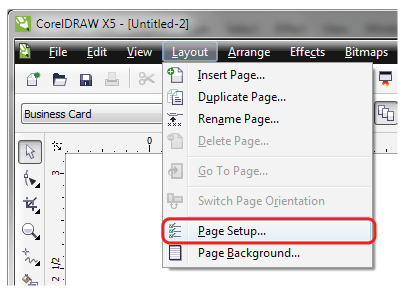
Click Layout > Page Setup...
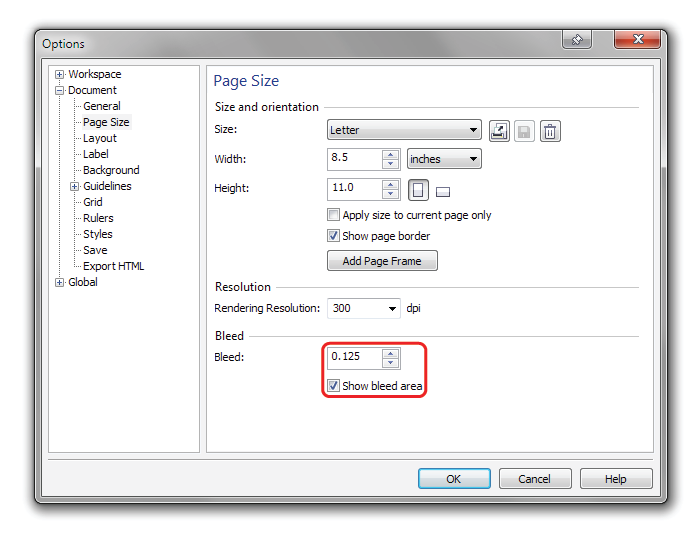
In the Bleed: box, type in 0.125
Check "Show bleed area"
Click OKTo set up a safety zone:
Click Layout > Page Setup...
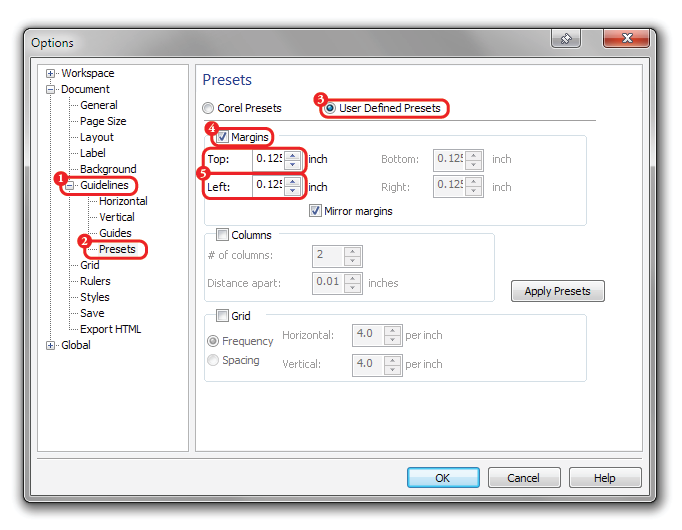
Click the + to expand Guidelines
Click Presets
Click the User Defined Presets round button
Check "Margins"
Type in 0.125 into the Top and Left boxes (if mirror margins is checked it will fill in the rest)
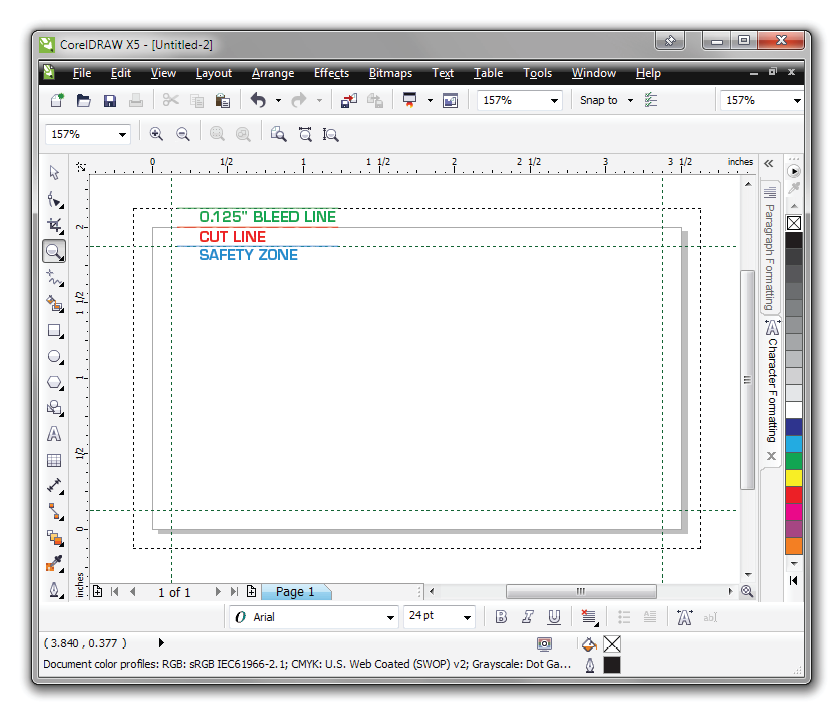
Click OKYou'll now see the lines as shown (labels added for illustrative purposes)
2. Resolution
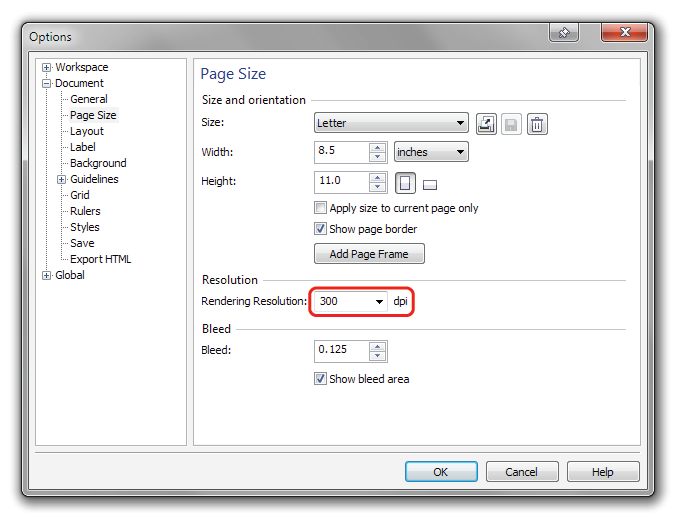
To ensure your outputted PDF from is at 300DPI:
Click Layout > Page Setup...
In the Rendering Resolution box, choose 300 dpi
3. Typography
Before proceeding - save a backup copy of your file to make changes to later.
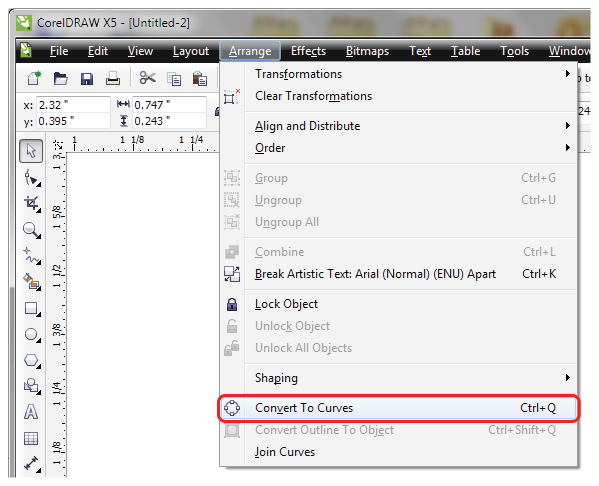
To convert text to outlines
Press Ctrl+A (to select All)
Click Arrange > Convert To Curves
When printing reversed text, such as white on rich black or dark colors, with small type below 8-pt, you should add a thin stroke (between .1pt to .25pt) of white (or light color) to compensate to avoid color overlapping and filling the text:

4. Color & Black
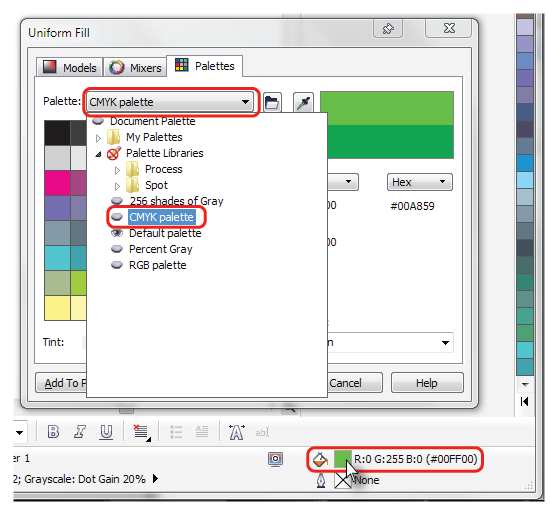
To ensure your CorelDRAW file is in CMYK:
For each object with a fill:
- Select each object you want to convert.
- Double Click on the color swatch at the bottom right, to bring up the Fill Color Dialog.
- Click the Palette: dropdown box
- Select CMYK palette (if not already selected)
- Click OK (Note: if you were using an RGB color, it may drastically change, the color must be CMYK)
5. Saving Your File
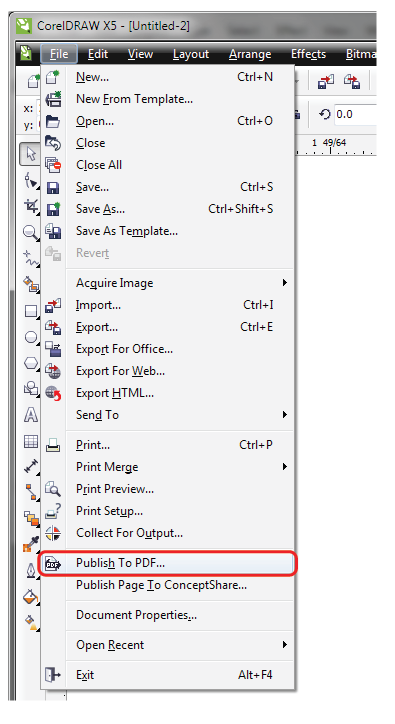
To save as a PDF with a bleed:
Click File > Publish To PDF...
Choose PDF/X-1a from the PDF preset list.
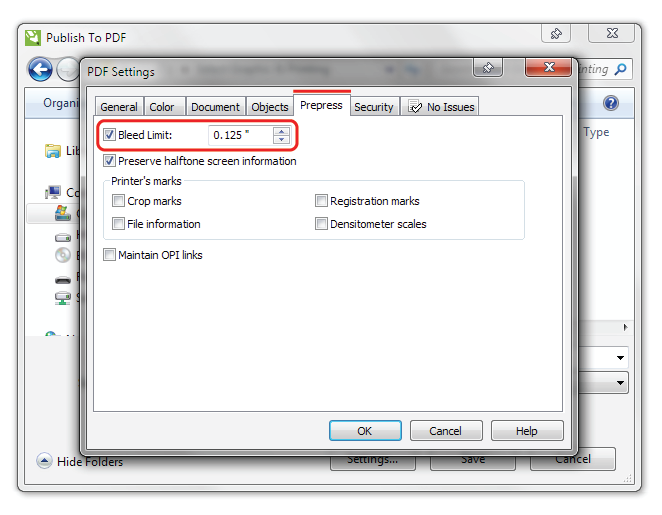
Click the Settings... button
Click the Prepress tab
Check the "Bleed Limit:" box
Type in 0.125 (if it's not already entered)Click OK
Click SaveOpen your PDF to verify it looks okay.



1 Comments
Awesome! Thank you!!!
ReplyDelete